Procreate: 5 Hidden Shortcuts and Gestures
Hello Creators!
From beginner to advanced, here are 5 great hidden Procreate shortcuts and tips I have discovered and use on a daily basis to speed up my workflow.
*Note: I am currently using the iPad Pro 12.9 and the Apple Pencil 2.
Add a Private Photo
Are you ever working and need to trace a previous sketch or image reference but hate when it appears in your time-lapse video? Now you can add a “private” photo to your layers and it will be hidden in your time-lapse and gallery.
Follow these simple steps:
1. Go to Actions > Add in your tool bar.
2. Instead of tapping Insert a photo, Swipe to the left and tap the grey Insert a private photo button. Tap to open your Photos app and add in your new private image.
3. Once added, your image will appear on your canvas and in the layers panel with the label Private under the layer title. Now you can use this image in your workflow without the worry that it will appear when you export your time-lapse video.
Extra Tip:
Need to adjust the opacity of your private image? Just click on the letter “N” in the layers panel to access the opacity tab, adjust to your needs and begin tracing!
2. Rapid Undo and Redo
While some may already use the tap gestures to undo and redo ( two-finger to undo, three-finger to redo), Procreate now has included the capability to rapidly redo and undo multiple actions in one touch. Speed up your process by adding these quick gestures to your workflow.
Follow these simple steps:
1. Rapid Undo - Tap and hold two fingers to rapidly undo a series of recent changes.
*Note: You can adjust the speed by going to Actions > Prefs > Rapid Undo Delay. There you can adjust the slider to speed up, slow down or delay how long to hold your fingers down before the rapid undo/redo begins.
Extra tip:
In some cases, you may prefer just clear an entire single layer. You can easily do this by taking three fingers and wiggle or “scrub” them back and forth on the screen. All of your elements will disappear in one move and you can now begin creating a new sketch.
3. Move your Color Wheel (Anywhere!)
Tired of constantly clicking back and forth to open your color wheel? Now you can move your color wheel anywhere on the canvas and it will stay open as you work.
Follow these simple steps:
1. Go to your toolbar and click on the color menu. Grab the top of the color menu tab and drag it out to anywhere on your screen. That’s it! Time-saving and extremely convenient… ahh it’s the little things.
*Note: Want to move it back? Simply close the color menu tab and it will move back to its original location at the top in the toolbar.
4. Layer Select Option
If you have ever worked into the wee hours to meet a deadline, you know what it’s like to accidentally scribble on a layer and struggle (cry? possibly contemplate your life choices?) as you sort through all of the layers to try and find what layer you drew it on. Well Procreate has come up with an easier, less traumatic solution called the Layer Select Option.
Follow these simple steps:
1. Go to Actions > Prefs > Gesture Control > Layer Select
2. Select the touch or pencil shortcut that suits you and your workflow best.
Note: When selecting your gesture, make sure it is new and not one that you are already using for other actions.
5. Create and Edit Quickshapes
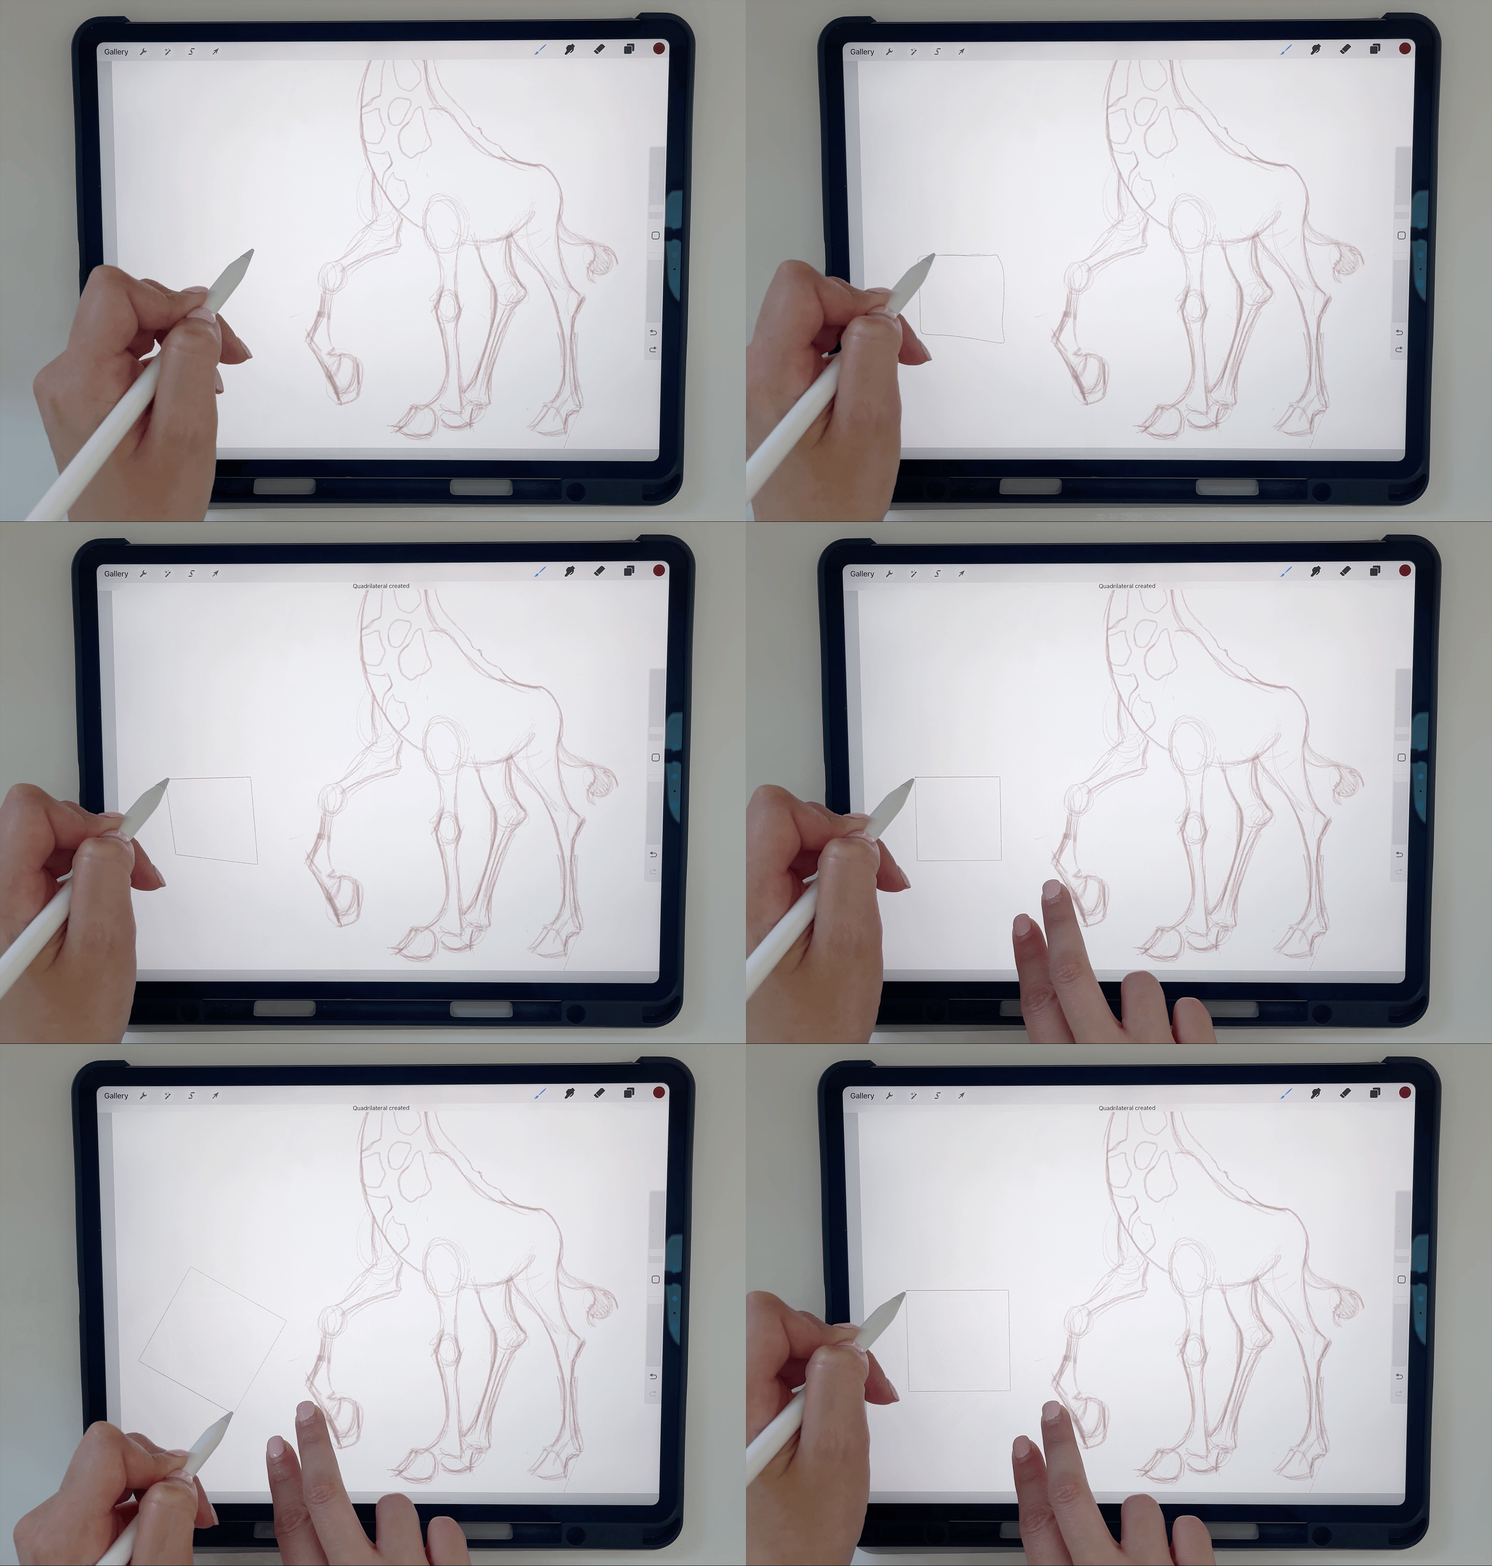
Struggle with creating the perfect circle or square? QuickShapes will become your best friend! With simple gestures, QuickShapes easily snap your hand drawn lines into the perfect shape.
Follow these simple steps:
1. Create your shape and while holding your pencil or finger down, place a second finger on the canvas. This will turn your shape into a rectangle, circle or triangle.
2. To edit your quickshape, continue to hold your second finger on the canvas as you drag to adjust the scale and rotation of the shape you’ve made (the rotation works in 15° increments)
Have fun!
I hope you have found these tips helpful! Procreate is a great tool that you can customize to your specific workflow. Make it work for you and stay creative! 🙂


